How To Paint A Brick Fireplace
Sam Lutz • September 23, 2014
DIY websites like Young House Love
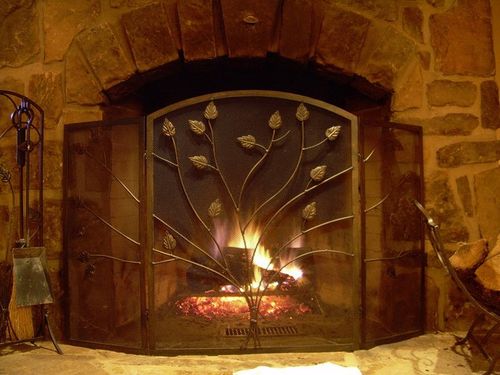
have helped popularize painted fireplaces. Painting your fireplace can freshen a dark room while giving the fireplace a trim and modern appearance.
That said, painting a brick fire place is not an easy undertaking, and once it’s done, it can never be undone. Before getting started with your project, take the time to ask yourself if this is something that you really want to do. Last June, we wrote a post about the pros and cons of painting your fireplace. We recommend taking a look at that posting before deciding whether to proceed. If you’ve decided for sure that painting your fireplace is right for you, these steps will help you along the way.
Materials:
- Rag
- Stiff-Bristled Brush
- Painter’s Tape
- Tarps
- Masonry Primer
- Breathable Latex Paint
- Heavy-Nap Paint Roller
- 1-Inch Angled Paintbrush
- Paint Tray
Process:
- Clean the fireplace with a damp rag to remove cobwebs and dust. Remove any effervescence (salt deposits) from the brick using a stiff bristled brush. Note that if effervescence exists on your bricks in large quantities, this is indicative of a larger problem that must be addressed before proceeding with painting. Painting a fireplace with an effervescence problem may cause salts to become trapped inside the brick, resulting in spalling.
- Leave the brick to dry for 24 hours.
- Line the fireplace with tarps and painter’s tape to protect the area around the hearth during the painting process.
- Paint the fireplace with a masonry primer. Use a heavy-nap paint roller to apply paint over as much surface area as possible, then use an angled one-inch paint brush to cut-in the edges and cover the knocks and crannies.
- Wait for the primer to dry. While you’re waiting for the primer to dry, wash off the paint brushes and paint rollers.
- Apply the first coat of paint on the fireplace, using the same methods that you used to apply the primer.
- Wait for the first coat to dry. Proceed to the next step when the first coat is no longer tacky to the touch.
- Apply a second coat of paint to the fireplace. Wait for the second coat of paint to dry, then add another coat if necessary. You may need to apply three coats to fully cover the fireplace.
Tips:
- Lighter paint colors will go a long way toward lightening up a room, but note that soot will show on very light colors and will require frequent cleaning.
- Do not paint the firebox (the interior of the fireplace) unless necessary. The firebox will require special paint that can withstand very high temperatures. If you must paint the firebox, speak with a paint professional about the best type of paint to use.
- Note that brick is a highly absorbent, porous material that will require more paint than you would usually require for a comparable surface area.
- Remove any heavy deposits of soot before painting. This website has several tips for cleaning soot from brick.
Finally, if you have more questions about painting your fireplace, residents of the Pittsburgh area are encouraged to stop in at Ace Paint and Unfinished Furniture, or give us a call at (412) 531-2029. We’d love to answer your questions and help you pick the right type of paint for this project. Readers who have any tips and suggestions are welcome to leave their thoughts in the comments box below this post. We’re looking forward to hearing from you!
One of the wonderful things about good wood furniture is that it doesn’t have to be merely functional. It can be beautiful as well. We’ve seen some amazing pieces made with wood stains that are more than just furniture, they’re works of art. So if you’ve got an old table, desk or other piece of wood furniture that needs jazzed up, why don’t you consider using some of our great stains to try one of these ideas.

