Repaint Your Kitchen Cabinets
Sam Lutz • February 3, 2015
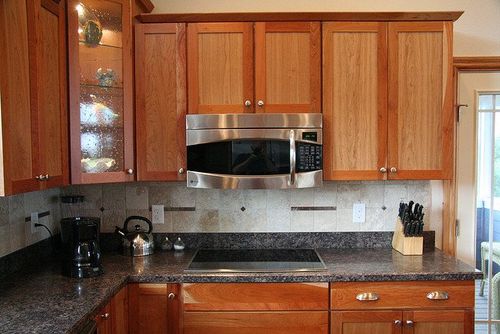
Kitchen remodeling can be expensive and time consuming. However, a full-on remodel isn't always necessary to give your kitchen the update it so desperately needs. Sometimes a simple coat of paint on your cabinets is an excellent way to lighten, brighten or change the mood of the room. This step-by-step tutorial will help you through the process of repainting your kitchen cabinets.
Materials:
- Screwdriver
- Tarps
- Wood Putty
- Putty Knife
- Degreaser
- Rags
- Gloves
- 100 Grit Sandpaper
- Primer
- Paintbrushes (Flat and Chisel-Edge)
- 220 Grit Sandpaper
- Paint
Process:
- Remove the cabinet doors and hardware (like hinges and handles).
- Lay tarps down on the location where you plan to paint the cabinets, to prevent paint from getting on the floor.
- Lay the doors out on a smooth, flat surface, and mark each door and cabinet to indicate which cabinet goes with which door. If you plan to reuse the handles and hinges, place each set of hardware next to the corresponding door, to ensure the same handles and hinges are put back on the same doors. This will ensure that screw holes will line up properly when it's time to put the hinges and handles back on the doors.
- Use a putty knife to fill all the hardware holes and screw holes with wood putty, if you don't plan to reinstall the hinges and door handles after the painting project is over.
- Clean all surfaces that will be painted using a degreaser. Depending on the type of degreaser you use, gloves may be necessary to protect your hands. Follow all manufacturer's instructions.
- Sand the parts of the cabinets that you intend to paint. This will rough up the surface and get the cabinets ready to accept paint. Sand down any raised mounds of wood putty from step 3 so that the newly covered holes are seamless and even with the rest of the wood.
- Paint the cabinets with primer and allow them to dry for several hours, until the primer is no longer tacky to the touch.
- Sand the primed cabinets with 220 grit sandpaper to rough up the surface a little bit, and sand out any brush strokes for a smooth finish.
- Wipe down all surfaces with a clean wet rag to ensure that no wood dust remains on the cabinets.
- Paint the cabinets with a second coat of primer, then repeat steps 7 and 8.
- Paint the cabinets over the primer with the paint color of your selection. Allow the paint to dry for two hours.
- Paint the cabinets with a second coat of paint, and allow the cabinets to dry for 2 hours.
- Put the hardware back on the cabinets and replace the cabinet doors.
Alternatives:
Now that we've told you all about the traditional way to repaint your kitchen cabinets, we'd like to mention this a product by Rustoleum, which claims to be revolutionizing the kitchen cabinetry repainting process. Rustoleum's new "Cabinet Transformations" product involves no sanding or stripping, and all necessary materials (minus the paintbrushes and gloves) come in a kit. For more information, check out the Retrorenovation site, where they have a page posted about the entire process.
Resources:
We found several useful cabinet-painting tutorials online. Here are a few:
That's the whole process. If you have questions about the painting process, we encourage residents of the Pittsburgh area to stop in at Ace Paint and Unfinished Furniture.

There are all kinds of wooden furniture: modern, antique and everything in between. We’ve talked about style differences, but what about how it’s made and what it’s made of? Is there a large difference between the wood furniture of today and yesterday?

Colors are so fascinating. They make us feel, they help us express how we feel. The right colors can really set the mood in a room, or on an outfit. There’s a lot to color theory and what each of the colors mean. This St. Patrick’s Day we thought it’d be fun to explore a little about green.

One of the wonderful things about good wood furniture is that it doesn’t have to be merely functional. It can be beautiful as well. We’ve seen some amazing pieces made with wood stains that are more than just furniture, they’re works of art. So if you’ve got an old table, desk or other piece of wood furniture that needs jazzed up, why don’t you consider using some of our great stains to try one of these ideas.

What's your furniture style? Here’s a few of the more popular styles and the kind of look they give your home.

Wood is our most basic raw material used for creating furniture. Wood furniture is timeless, and the aesthetic options are endless. Let’s talk about a few today, shall we?

The 2010s saw an uptick in modern interiors, bringing in clean lines to decor and furniture, so what does the new decade have in store? Restyle your home for the new year with the latest trends.

Are they bright and bold? Wild and wacky? It’s a thrill for our industry to learn what the latest “in” colors will be each year, and they never disappoint. The color trends for 2020 include shades of green, blue and pink, and each have an inherent welcoming quality.

Holiday parties are part of the magic of the season, but the cleanup is a pain—especially when furniture is involved. Prevent disasters with a few tips on how to protect your furniture during holiday parties.

The holiday season has arrived, and soon every corner will be decked out in red and green. But have you ever stopped to think about what holiday colors mean?

Restaining an old piece of furniture with a new varnish color can go a long way, but first you need to remove the old stain color.