Blog Layout
How to Paint a Bathroom Vanity
Sam Lutz • Sep 15, 2015
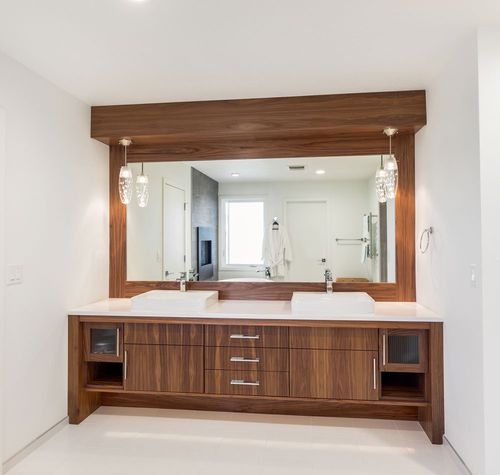
Bathroom vanities can cost hundreds or even thousands of dollars. Although sometimes it’s necessary to replace a vanity that has become damaged, it’s much cheaper (and maybe more rewarding!) to repaint your vanity. Following the steps below, you can transform your bathroom vanity and make it into a masterpiece.
The Process
- Take the doors off the vanity and remove the drawers. It helps to subtly label the drawers and doors so you can be sure to get them back into the right places when you’re done.
- Remove the hardware. Put the hardware with the appropriate screws in separate baggies, and keep the baggies with their affiliated doors or drawers. This will ensure that you can easily put everything back the way it’s supposed to be.
- Fill the cracks in the surface of the vanity with wood filler. This is important for wooden vanities, because filling in the holes eliminates the wood grain texture. Wait for the wood filler to dry before moving on. If your vanity is made from a smooth laminate, skip this step.
- Use an electric sander to sand the surface of the vanity. If your vanity is made of wood, start with a coarse sandpaper to remove the old finish and switch to a finer sandpaper once the surface has been completely sanded. If your vanity is made of laminate, sand it very lightly with a fine sandpaper so the surface of the vanity becomes just textured enough that the primer will adhere to it. Remember to sand the inside of the doors and drawers, if you plan to paint them.
- Wipe off the sawdust with tack cloth. This will ensure good adhesion when it’s time to paint.
- Coat the surface of the vanity with a liquid deglosser. This will help prepare the surface for painting.
- Prepare the area for painting. Lay down a tarp and tape the edges of the vanity that you don’t want to be painted.
- Paint the sanded surfaces with primer. Durable oil-based primer creates a hard, impenetrable shell that will protect your vanity from moisture and scratches. Apply the primer to the surface of vanity with a roller on wide, flat areas and use an angled brush to apply paint to the corners and narrow edges. Wait for the primer to dry then move on to the next step.
- Paint the primed surfaces with two thin coats of paint. The type of paint you buy will depend on the material that you’re painting, so be sure to ask a representative at the paint store before buying the type of paint. To apply the paint, use a roller for the flat areas and use an angled brush to fill in the corners and narrow edges. Use a soft brush to smooth out any drips or unevenly applied paint. Allow the paint to dry between coats.
- Let the paint cure. The length of time that the paint needs to cure will depend on the type of paint applied and the humidity of the room. Once the paint has finished curing, reattach the hardware, doors and drawers.
There are a variety of helpful tutorials online that can help you during this process. Many of them have excellent pictures
and helpful tips.
For those of you who might be thinking about using a chalk paint and sealer technique, you can take a look at this online video, which gives some helpful tips:
If you’re still feeling lost after reading this tutorial and taking a look at the other tutorials available online, stop in at Ace Paint and Unfinished Furniture. We’ll be happy to provide you with advice and we’ll also show you the best paint to use for your vanity!

There are all kinds of wooden furniture: modern, antique and everything in between. We’ve talked about style differences, but what about how it’s made and what it’s made of? Is there a large difference between the wood furniture of today and yesterday?

Colors are so fascinating. They make us feel, they help us express how we feel. The right colors can really set the mood in a room, or on an outfit. There’s a lot to color theory and what each of the colors mean. This St. Patrick’s Day we thought it’d be fun to explore a little about green.

One of the wonderful things about good wood furniture is that it doesn’t have to be merely functional. It can be beautiful as well. We’ve seen some amazing pieces made with wood stains that are more than just furniture, they’re works of art. So if you’ve got an old table, desk or other piece of wood furniture that needs jazzed up, why don’t you consider using some of our great stains to try one of these ideas.

What's your furniture style? Here’s a few of the more popular styles and the kind of look they give your home.

Wood is our most basic raw material used for creating furniture. Wood furniture is timeless, and the aesthetic options are endless. Let’s talk about a few today, shall we?

The 2010s saw an uptick in modern interiors, bringing in clean lines to decor and furniture, so what does the new decade have in store? Restyle your home for the new year with the latest trends.

Are they bright and bold? Wild and wacky? It’s a thrill for our industry to learn what the latest “in” colors will be each year, and they never disappoint. The color trends for 2020 include shades of green, blue and pink, and each have an inherent welcoming quality.

Holiday parties are part of the magic of the season, but the cleanup is a pain—especially when furniture is involved. Prevent disasters with a few tips on how to protect your furniture during holiday parties.

The holiday season has arrived, and soon every corner will be decked out in red and green. But have you ever stopped to think about what holiday colors mean?

Restaining an old piece of furniture with a new varnish color can go a long way, but first you need to remove the old stain color.